
Wrapped Loop Tutorial:
I've been asked how I get my loops to be so circular, so I put this tutorial together to show you (click on pictures to enlarge):


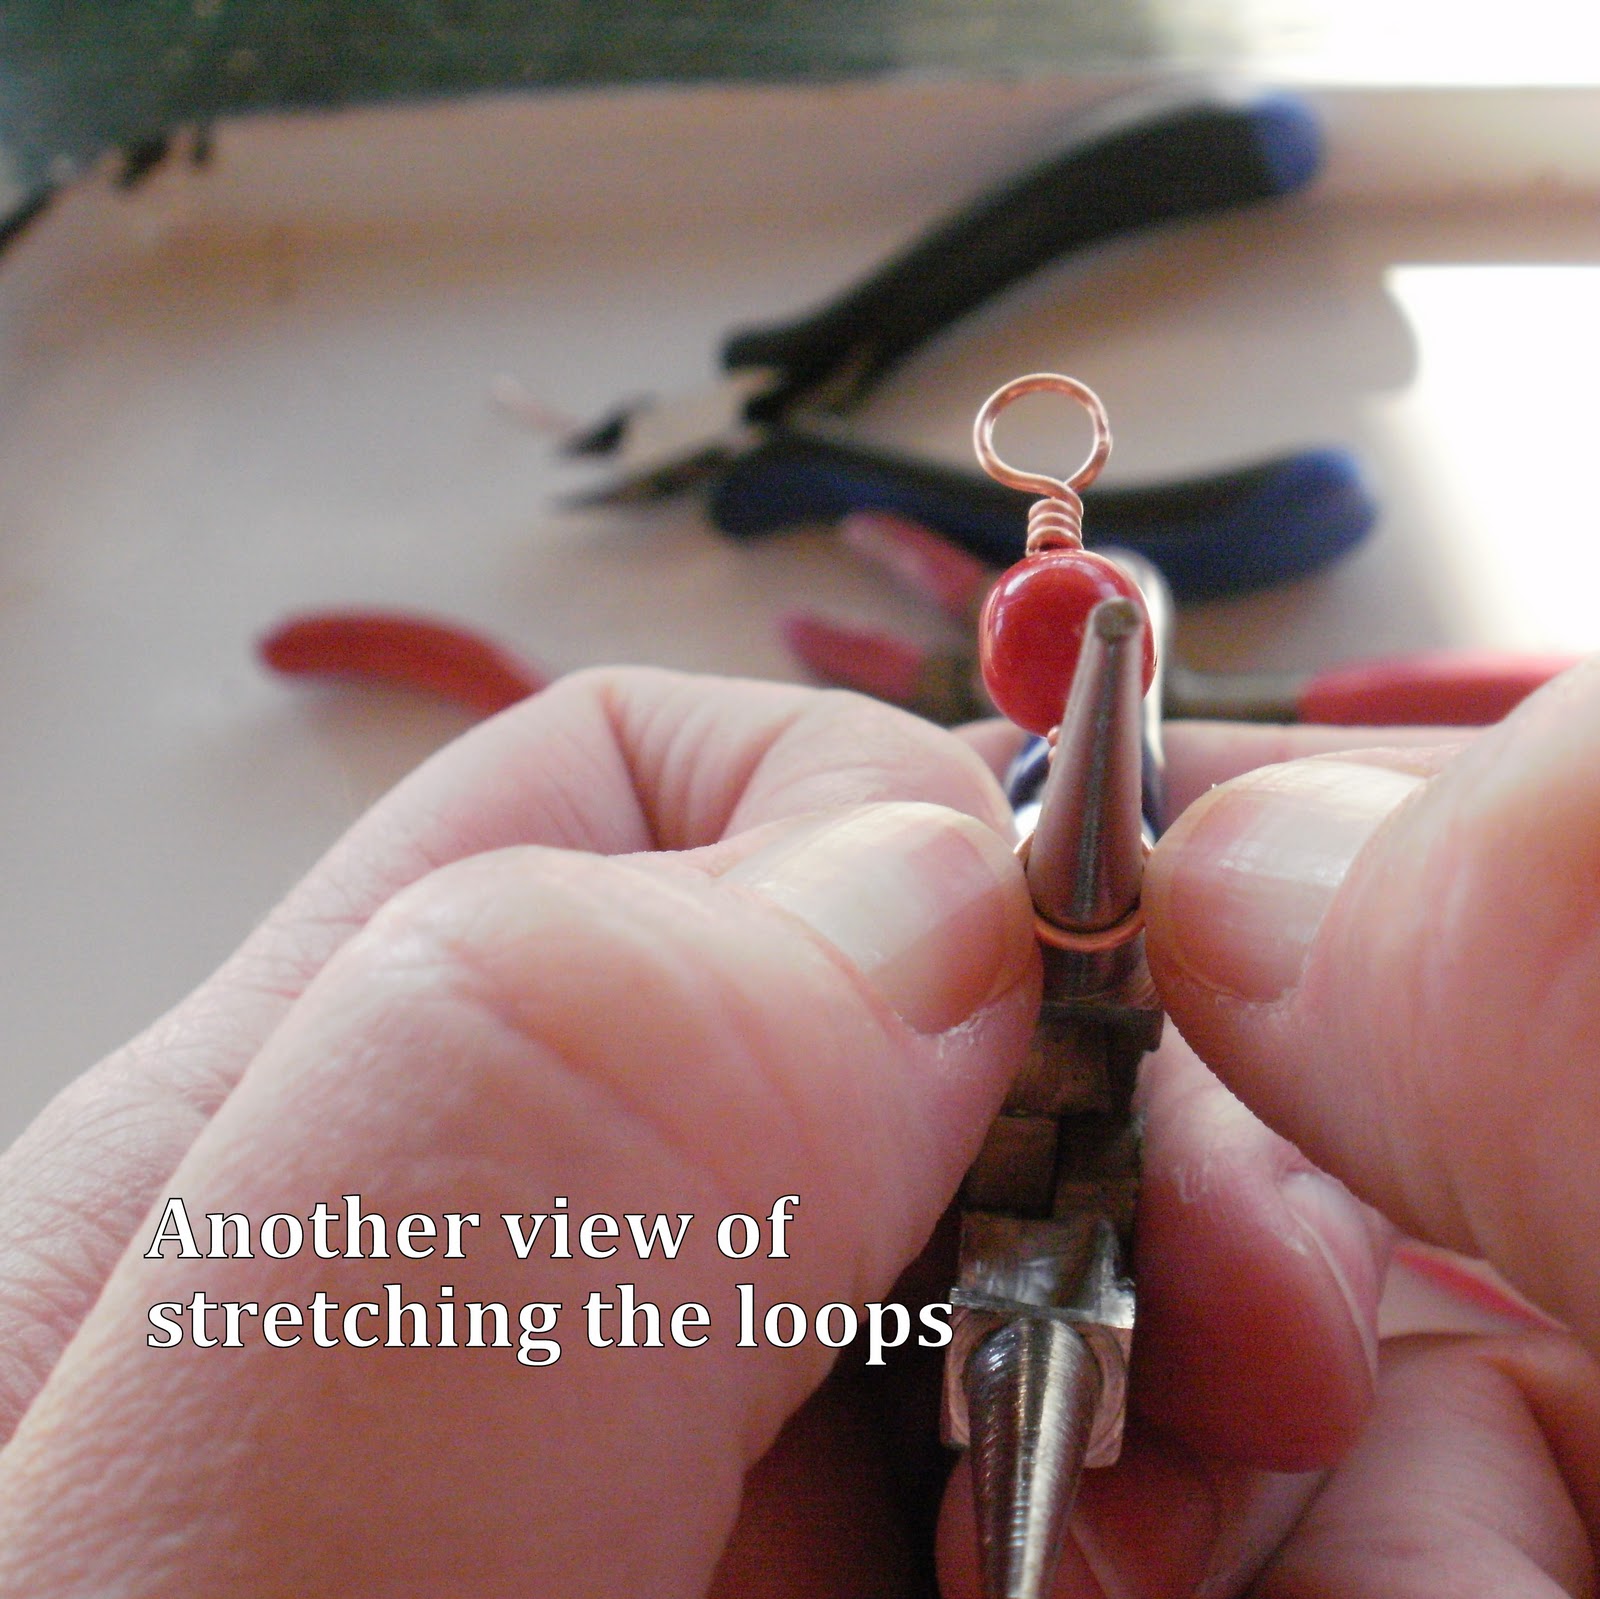
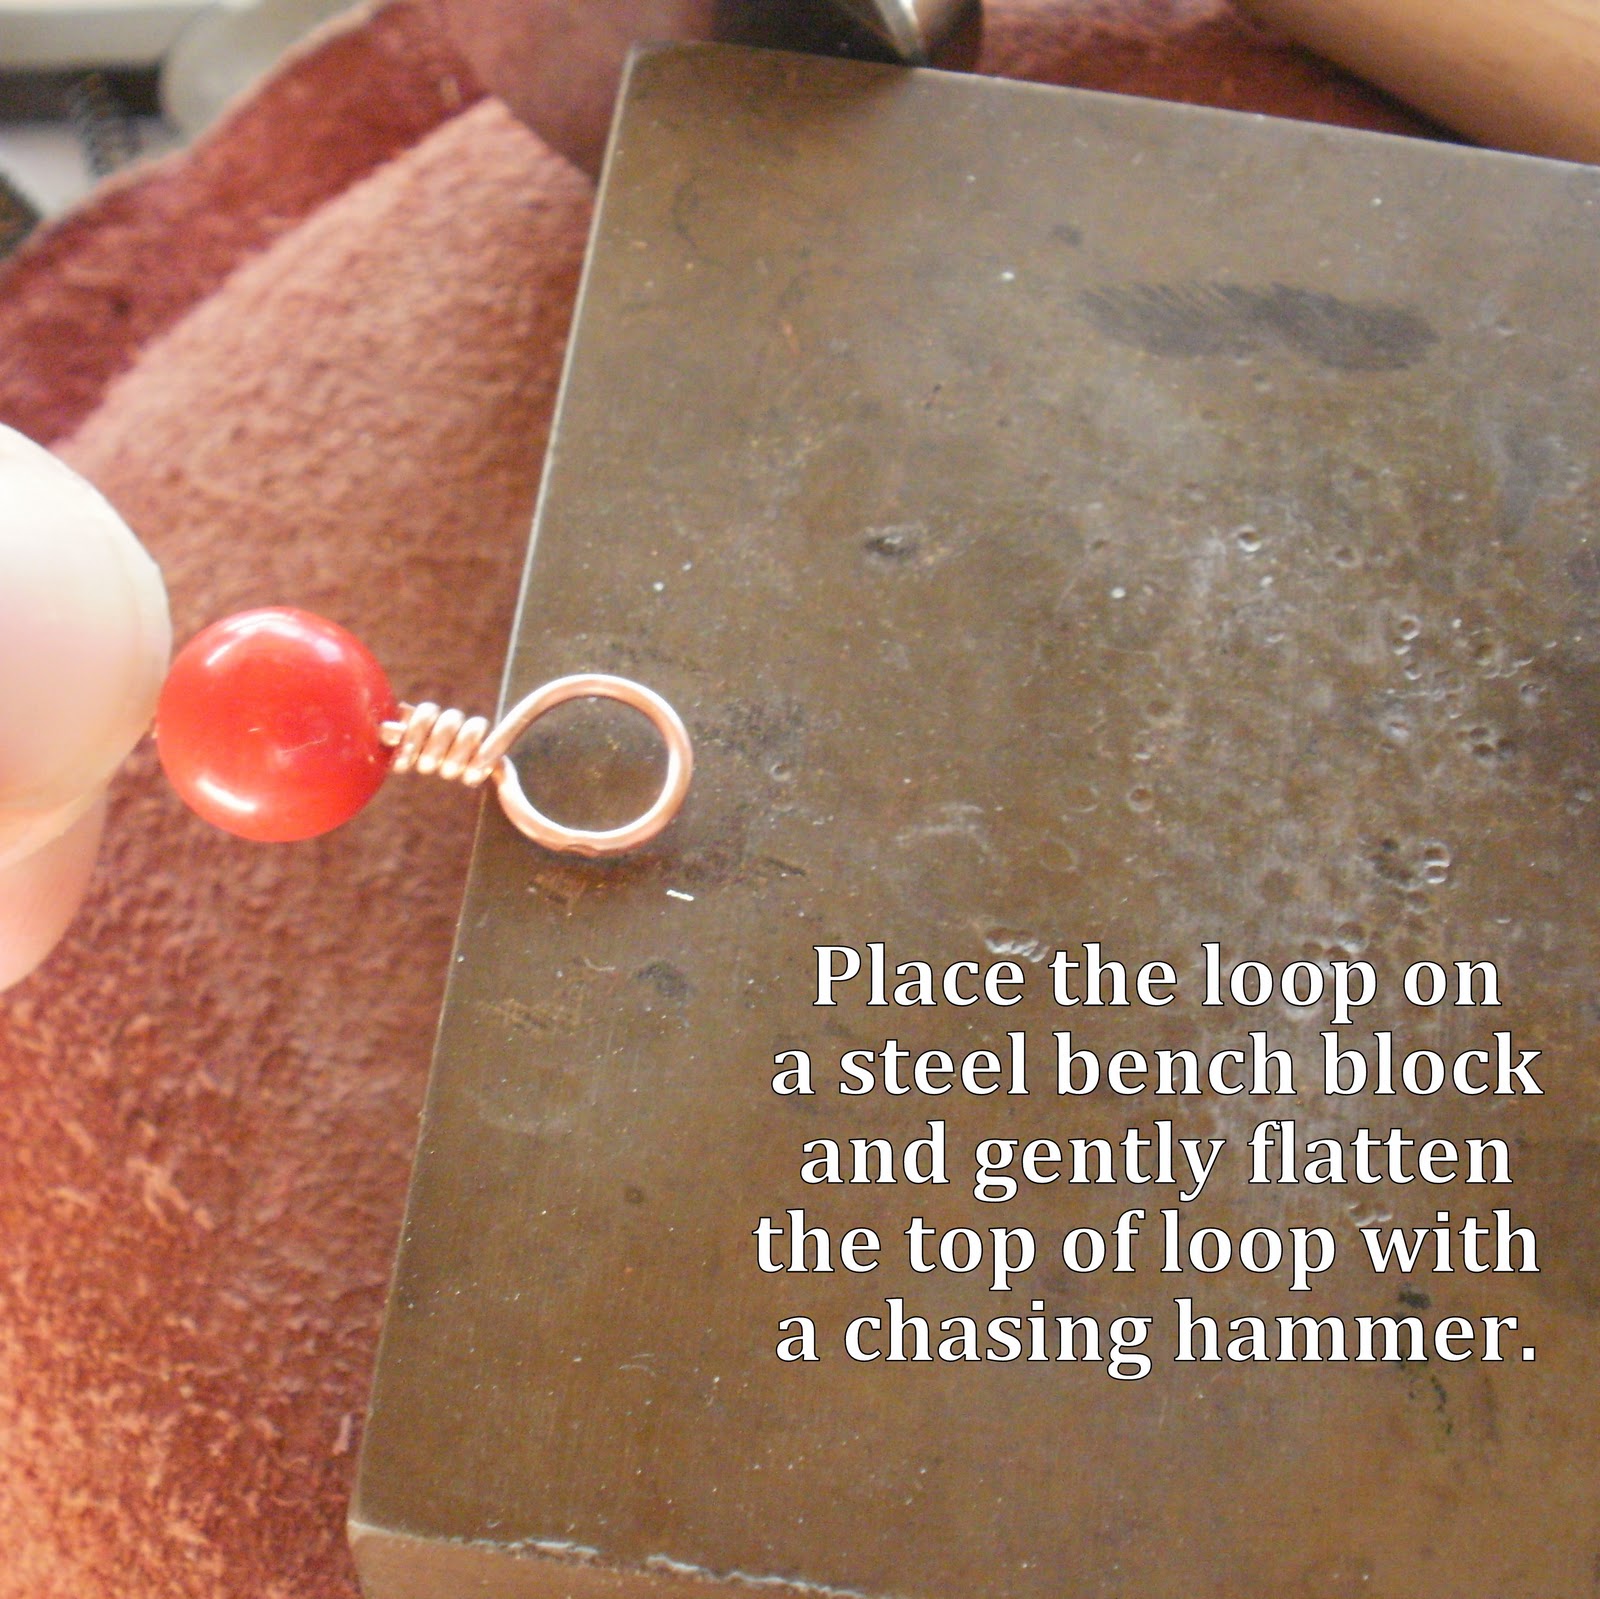

There it is - pretty simple! The key is in the right angles and the 'stretching' of the loops.
Etched Copper & Brass Tutorial:
* Note: This tutorial is the intellectual property of Molly Alexander, and cannot be reproduced without her written consent – thank you.
ETCHING BRASS AND COPPER WITH FERRIC CHLORIDE *
As far as etching goes, I've got a system down. I have tried both the ferric chloride and the muriatic acid/hydrogen peroxide mix, and I am a huge fan of the ferric chloride. It is so much easier, and, even though it is messier, I feel safer using it. Because this process is so messy, I tend to dedicate a day to etching many pieces at once.
You will need:
· Rubber gloves
· Flat copper and/or brass pieces (I like 18g or thicker because I can get really deep etching lines without the acid eating through the metal)
· Fine grit sand paper
· Rubbing alcohol
· Cotton squares or cotton balls
· Ferric chloride solution (I buy my solution either at Dick Blick (www.dickblick.com) or at Eletronix Express (http://www.elexp.com)
· Ammonia
· Clean water
· Black Sharpie marker
· Black Staz-On ink pad
· Decorative rubber stamps
· Redliner tape (the really strong double-sided tape sold in most craft stores)
· Flat styrofoam pieces (I use recycled pieces from packages I have received – usually the ones directly from manufacturers – NOT the ‘peanuts’). You can also buy styrofoam sheets at the craft store.
· 3 containers: 2 glass or plastic (not metal) dishes that are flat (think casserole dish or disposable ‘tupperware’) and can hold at least ¾” of liquid and still leave about ½” at the top (for the ammonia mixture and the ferric chloride) and one container for fresh water.
· Old toothbrush
· Baking soda
· Heat gun
· Ceramic tile or old brick
· Mineral Spirits or fingernail polish remover
· Fine grit sanding block or manicure sanding block
· Metal file for finishing the edges after etching
· Paper towels
Ferric chloride will stain anything it comes into contact with a school bus yellow, so be sure to protect your work surface, your clothing and your skin.
Preparing To Etch:
- Lightly sand each piece of metal and then use rubbing alcohol to clean the piece off. At the same time you clean the metal with the alcohol, clean off your fingers as well so your skin oils don’t interfere with the stamping process. (I use the little rubbing alcohol individual packets like they have at the doctor's office – you can get them at the drug store - they are very inexpensive and convenient, and I am all about convenience!)
- Set the copper pieces on a flat, heat-resistant surface such as an old brick or ceramic tile.
- Heat up the copper with the heat gun before you stamp the design, as the metal will take the ink better. Use the Staz-on black ink pad to stamp the metal with your rubber stamp of choice and then heat set the design with the heat gun. Heat it to the point that it starts to turn colors but not too much hotter, as the ink will start burning off . If you prefer, you can use a sharpie marker to hand-draw your design instead - just make sure to heat-set the ink before etching.
- Wait for the copper to cool enough that it can be handled without burning you (I have been known to use my tweezers to put the copper in the freezer to cool, as I have absolutely no patience whatsoever!).
- Using the black sharpie pen, color in the entire back side and run the marker along the sides of the metal to protect the border from the etchant solution. Heat-set the marker ink.
- OK...this might sound weird, but I swear it works great: find a piece of flat styrofoam and cut it so that it will fit into your container. Sometimes you will need to stack another slightly smaller piece on top of the bottom one to give the float a sort of "handle" to pull the metal pieces out of the solution when they are done etching. Also, if your metal piece is heavy, it might need an extra bit of styrofoam to help it float better. Use the "redliner" double-sided tape to connect the 2 pieces of styrofoam. The styrofoam keeps the metal floating, and thus off of the bottom of the container – this is very important, as the copper particles need to have a way to fall away from the metal during the etching process.
- Using the "redliner" tape, cover the flat side of the styrofoam, and then firmly press your metal to be etched into the tape. At this point, you should have, from the bottom up: your decorated and heat-set metal pieces stuck to the bottom layer of styrofoam with the redliner tape with the stamped design facing down, the 2nd layer of styrofoam stuck to the first with the redliner tape (see illustration).
- Fill one container (again, not metal) with about ¾ an inch of etchant solution.
- Fill a second container with a mixture of ammonia and water (about 1 part ammonia to 2 parts water)
- Have a third container ready with just plain old water.
Figure 1: Etching Copper and Brass

Etching the Metal:
- Place the styrofoam, metal side down, into the ferric chloride solution so it is floating on the top. I usually have a few of these "floats" in my container at a time so they don't get too heavy or hard to work with.
- Heat speeds up the etching process, so I usually leave the etching metal outside if it is warm (and let's face it - I do live in Arizona, so it usually is pretty warm!) or on an old heating pad, and check the progress every 30 minutes or so. The solution needs to be gently agitated every time you check the progress, so gently swirl the etchant by moving the container. I find that the copper etches the fastest, and that I usually have to leave the brass in longer.
- When you are satisfied with the depth of the etching, carefully pull the floats out of the solution and place them in the flat-bottomed glass container with the ammonia mixture. This will neutralize the ferric chloride and stop the etching process. Leave the metal floating in the ammonia mixture for about 15 - 30 minutes.
- Put on the rubber gloves, peel the individual pieces off of the Styrofoam, drop them into the plain water and then dry them off on a paper towel (the pieces will be very messy, so be sure to wear the gloves).
- You can save the etchant solution to use a couple more times, but just know that it will take longer and longer to etch the metal as the etchant gets older. I store my used etchant in old pickle jars and date the jars with the first date I used it.
- To get the sticky residue from the redliner tape off of the back, I use mineral spirits or some fingernail polish remover, and I just use a toothbrush with water and my handy alcohol swabs to get the ink off. Sometimes the ink is pretty stubborn, so I just sand it off with some fine sandpaper. I like those foam sandpaper blocks or manicure emery blocks because they can get into all the little nooks and crannies of the etched pieces. An old toothbrush with baking soda also works well!
- To dispose of the ferric chloride, first you must neutralize the acid by mixing baking soda into the container with the acid. The mixture will ‘fizz up’ and overflow the sides of your container, so make sure you are doing this on a stack of old newspapers or on a surface that you don’t mind getting really messy. I highly recommend doing this part of the process somewhere outside. DO NOT PUT THE SOLUTION DOWN THE DRAIN – IT WILL EAT THROUGH YOUR PIPES!
Now you are ready to go - I swear it is easier than it sounds! Just remember that the solution will turn your skin bright yellow, but you can get it off with a baking soda and water paste and a fingernail brush I actually experimented a little, and left a couple of pieces in overnight, and the results were really cool! The etchant ate through parts of the copper and they ended up looking like fossils!
Have fun!
* Note: This tutorial is the intellectual property of Molly Alexander, and cannot be reproduced without her written consent – thank you.